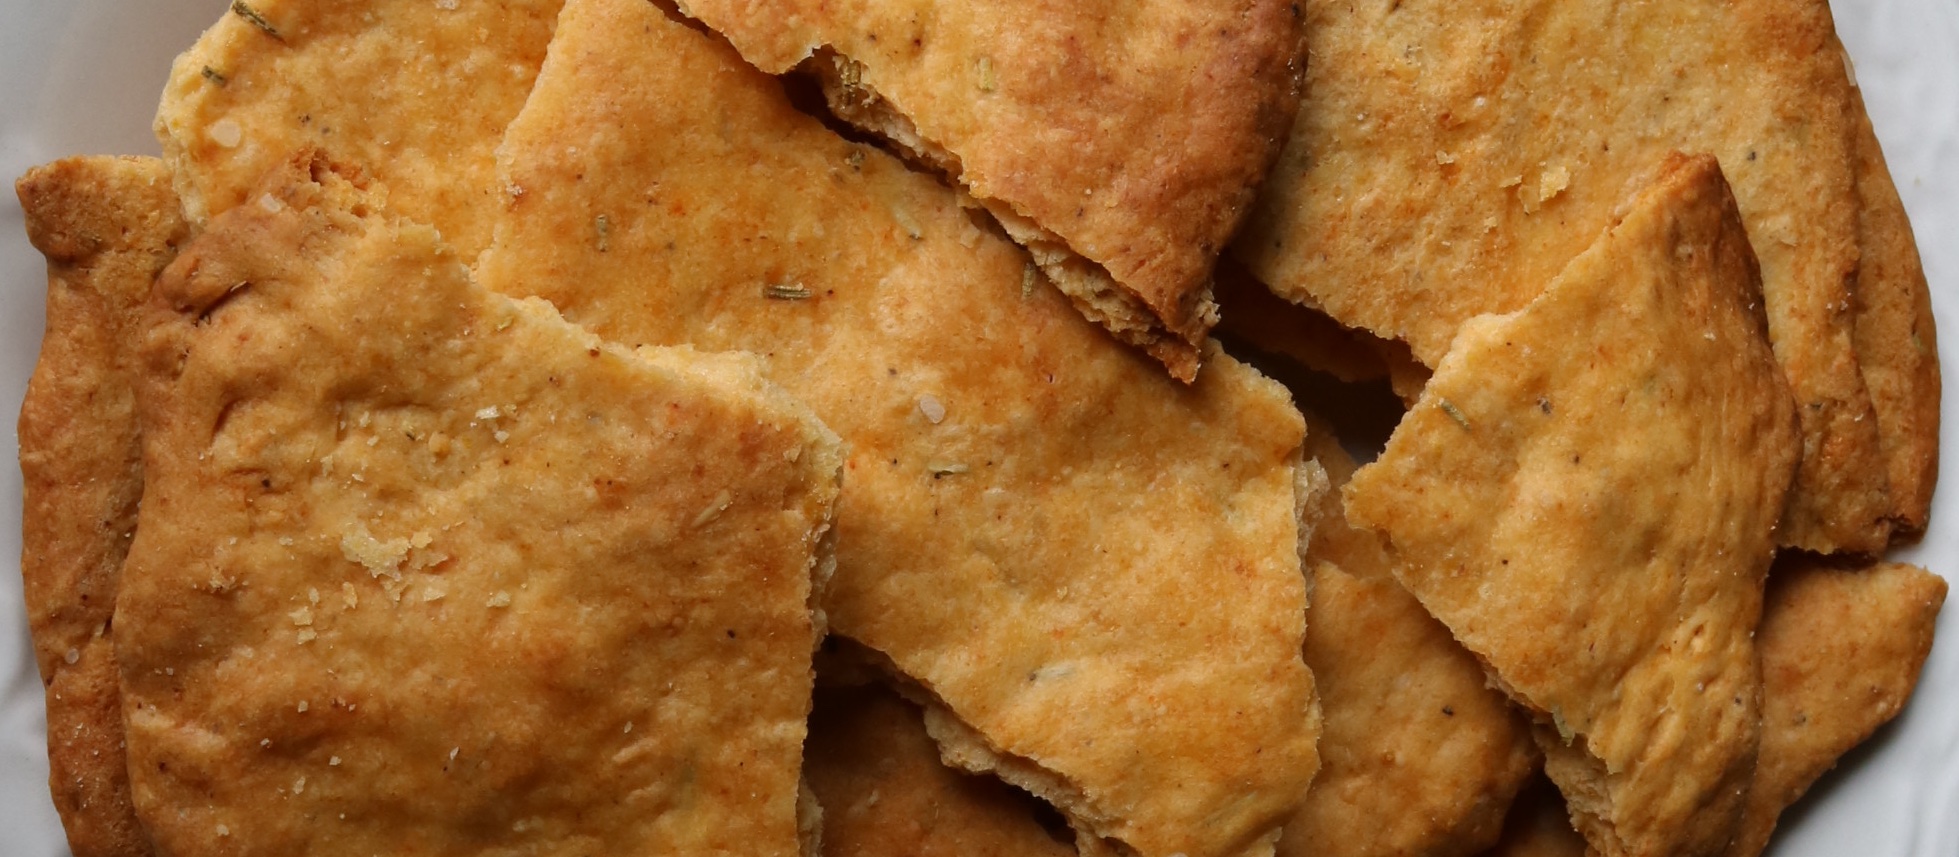
These crackers are simply addictive. They are crisp, they are cheesy, and they have depth. They taste like real cheese instead of some fake processed cheese flavor that many store bought crackers taste like. And best of all, they are a crowd pleaser that are sure to impress and come together in a few minutes in just one bowl.
These cracker were an adoption of an adoption of a recipe from the Smitten Kitchen blog for crispy rosemary flatbreads. I had tried a few cracker recipes before trying the one on Smitten Kitchen, and they were all very dry and bland, more like water crackers (or as my boyfriend bitterly referred to them, cardboard). Although these were described as a flatbread, I figured I could just roll them out a bit thinner and crisp them up a little more, and they would function as a cracker. The first time I made these, I mostly stuck to the recipe as written and they turned out fantastic and disappeared within a few days - definitely not cardboard. Then, when I had a friend visiting and staying with me who adores Cheez-It crackers, I thought I would try making her a “gourmet” version using my lightly adapted recipe. This recipe is what resulted from that experiment, and I am so glad she & her Cheez-It obsession visited because (amongst other things) she sparked the inspiration for & development of this recipe.
This recipe makes approximately 30 crackers, depending on the size and thickness.
Ingredients
- 1 3/4 cups (210 g) all-purpose flour
- 1 teaspoon baking powder
- 1 teaspoon kosher salt
- 1 1/2 tablespoons nutritional yeast
- 1 teaspoon smoked paprika
- 1/2 teaspoon pepper
- 1/4 cup freshly grated Parmesan cheese
- 1/4 cup unsalted butter, melted
- 1/2 cup water
Directions
- Preheat the oven to 425 F
- In a medium bowl, measure and whisk together the flour, baking powder, salt, nutritional yeast, smoked paprika, and black pepper
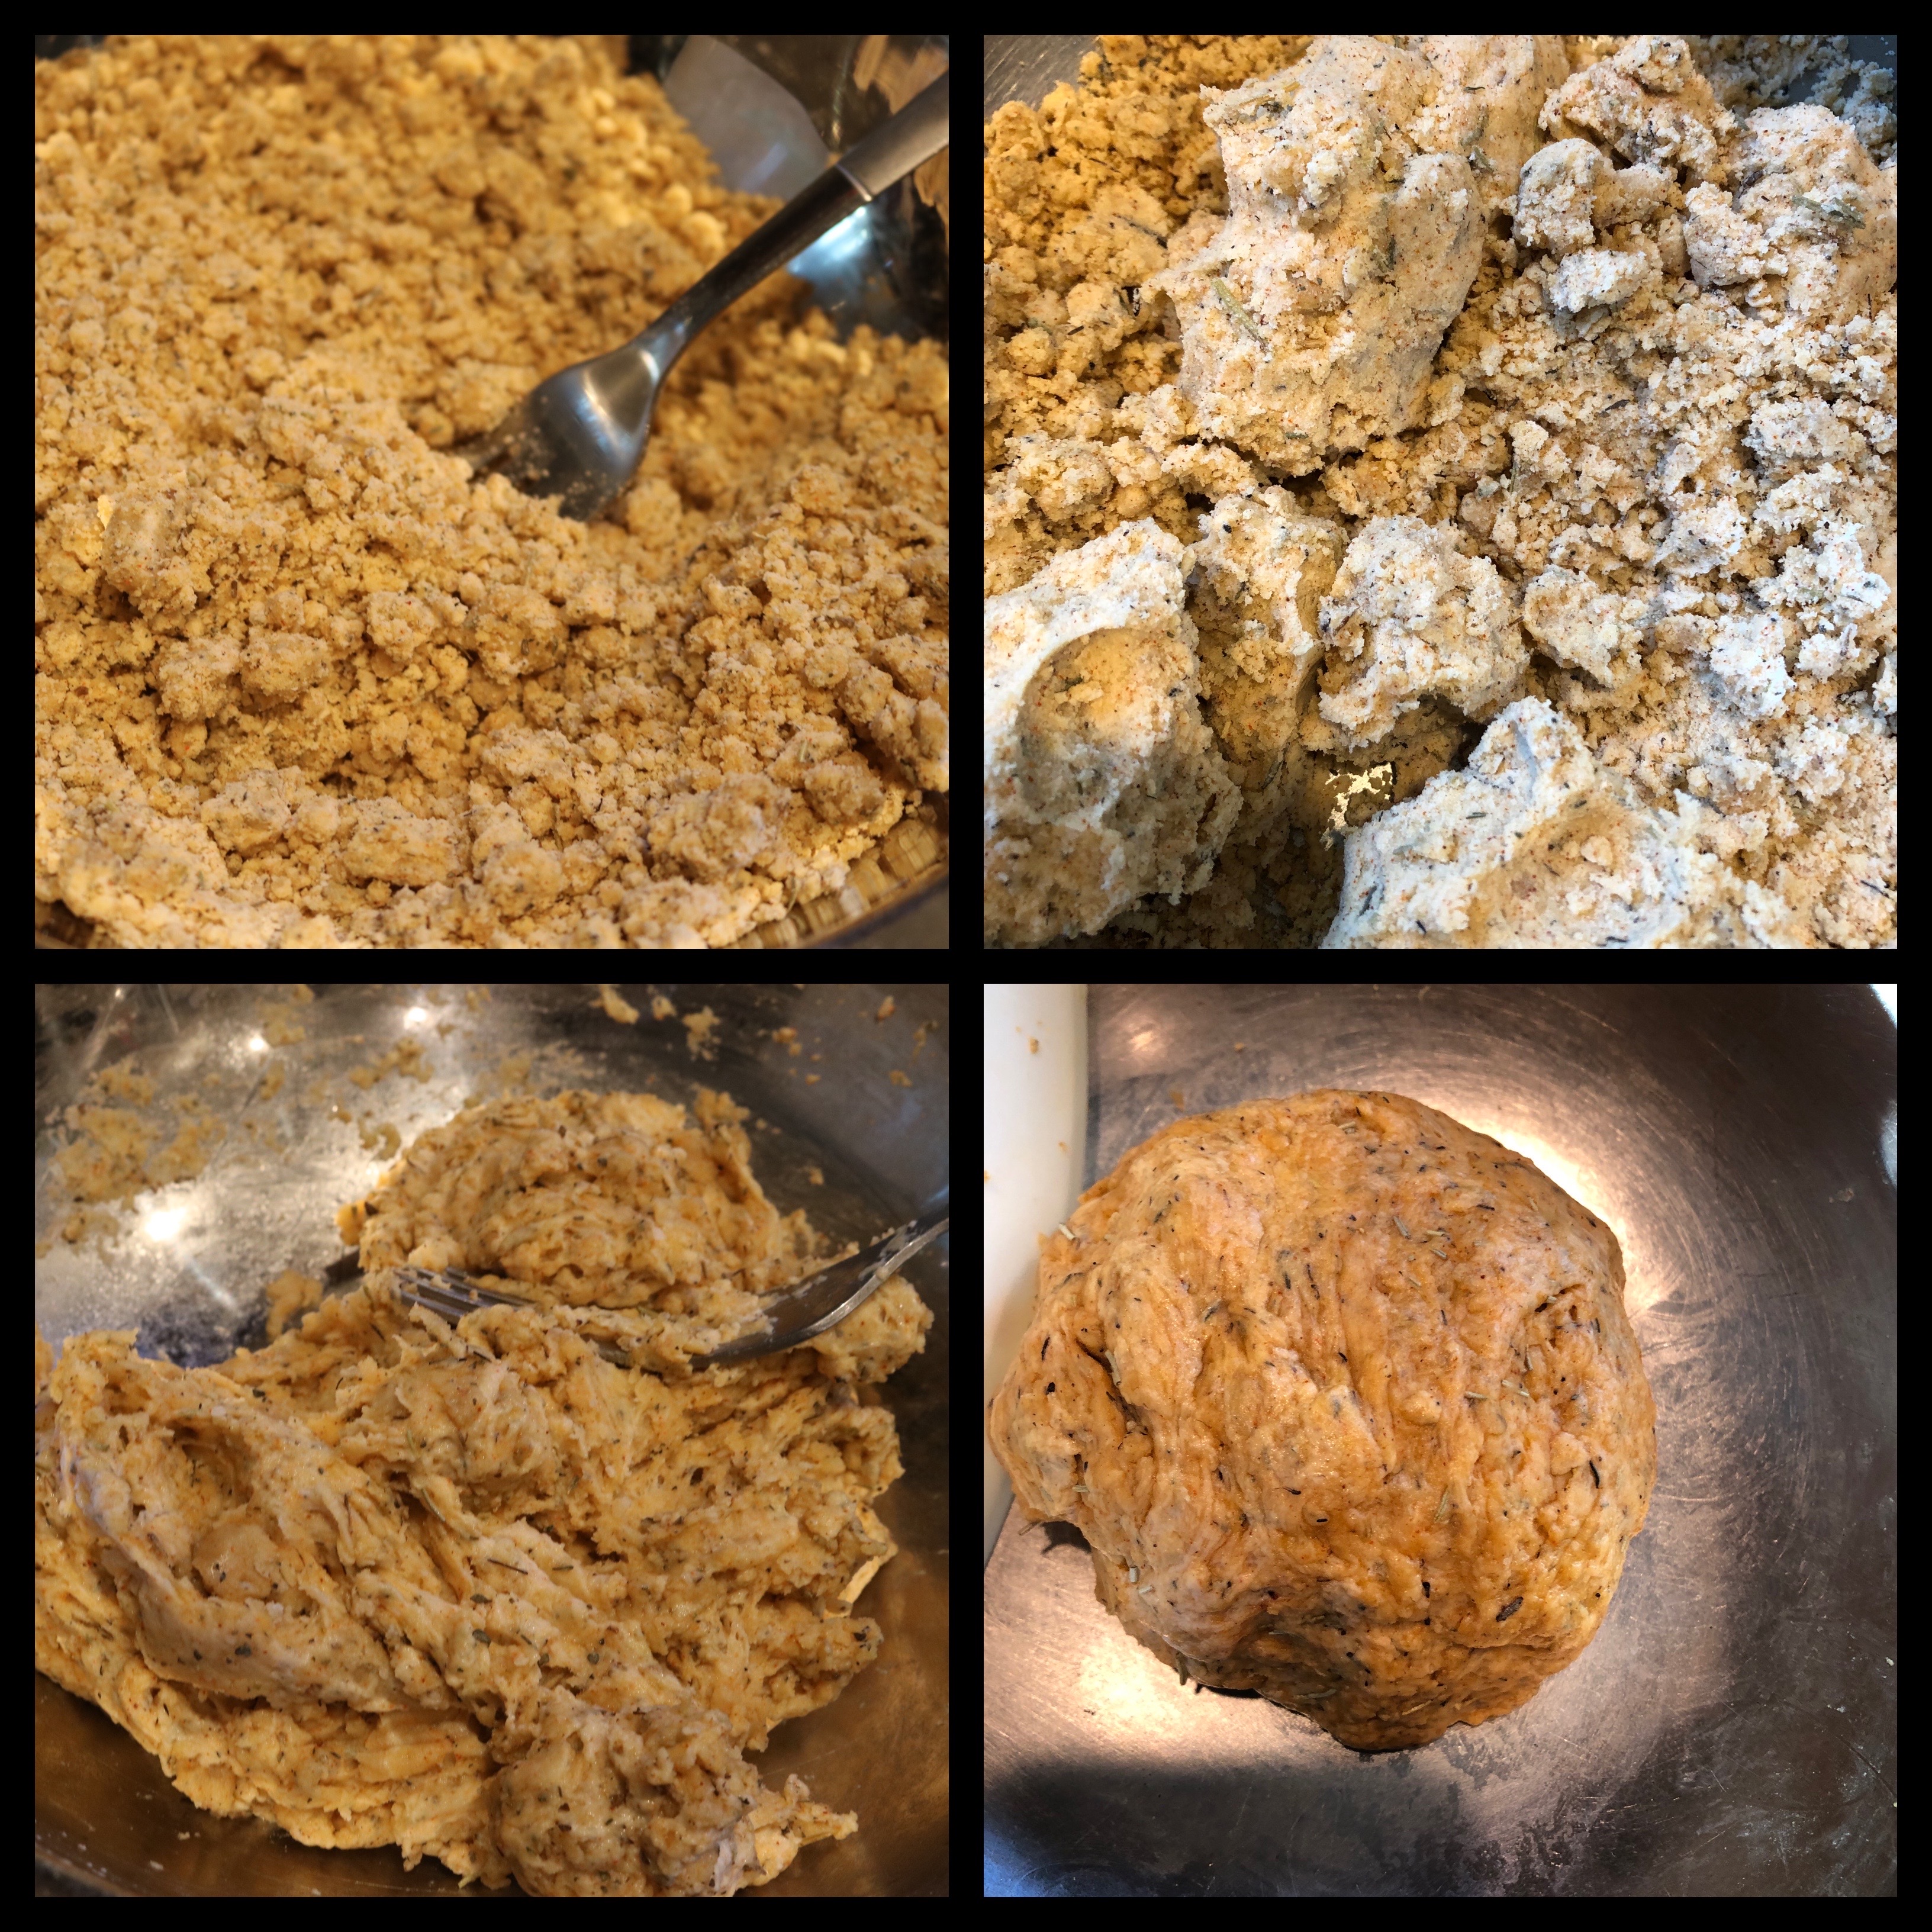
- Pour the melted butter over the flour mixture and work the butter into the flour using a fork or your fingers to rub it in; it should have a somewhat sandy consistency and will start to form clumps if squeezed together.
- Add the Parmesan cheese to the bowl and mix, coating the cheese with the flour mixture
- Drizzle the water over the flour mixture and combine using a fork into a shaggy ball. Then switch to a spatula or bowl scraper to knead slightly into a smooth ball. The dough should be smooth and moist, but shouldn’t be sticky thanks to the butter. If the dough is dry after a bit of kneading, add more water to ensure the crackers don’t end up dry
- Divide the dough into 3-6 equal portions depending on what you’re comfortable working with at a time. Shape each portion into a ball and cover all but one. Roll out each portion of dough to 1/4 in thick for thin crackers, or up to 1/2 in for thicker crackers. The shape is not important since you’ll be breaking up each portion into smaller crackers
- Gently lift and place the rolled sheet onto a lightly oiled baking sheet. The crackers won’t spread so you don’t need to spread them too far apart. Continue rolling out the remaining portions of dough, keeping both the dough balls and rolled dough sheets covered to avoid drying out
- Bake for 10 - 15 minutes, or until lightly browned, rotating halfway through. If you want a softer, more flatbread like cracker (recommended if you rolled them out thicker), you can remove the crackers after their first bake and let them cool on a cooling rack and break up into bite size pieces when fully cooled. If you want them as a proper, crisp cracker (recommended if you rolled them out thinner), then lower the oven temperature to 375 F while the large crackers cool for 5 - 10 minutes on a cooling rack. Then break the large crackers into the smaller, bite size crackers and bake again for another 5 - 10 minutes or until crisp through. Cool fully on a cooling rack.
- Store crackers in an air tight container for up to 5 days. The cracker will still start to stale after that and may not be as enjoyable on their own, but can still be used with cheeses, spreads, or dips.
Notes
Baking temperature & time: Be careful when baking these crackers. Since they’re so thin and the oven temperature is so high, they can go from underbaked to burnt very quickly. Monitor the oven closely once you get over the 10 minute mark. That’s also why I prefer baking at 425 F over 450 F, though if you’re in a hurry, you can certainly increase the temperature to 450 F and skip the second bake.
Also, if you prefer a more modern look to the crackers, feel free to slice them into squares or rectangles using a knife, or into circles using cookie cutters, and bake them individually. They’ll bake much faster so keep a close eye on them and rotate at 5 minutes.
Flavor profile & substitutions: This recipe is extremely customizable and forgiving. If you want a stronger cheesy taste, add more nutritional yeast and Parmesan cheese, and swap out some of the water for milk. If you’re vegan, omit the Parmesan cheese and only use the nutritional cheese and swap the melted butter for 1/3 cup olive or vegetable oil. If you want a more punchy flavor, increase the black pepper and sprinkle in some garlic or onion powder. In the mood for something more refined? Swap out the cheese altogether and use rosemary, thyme, sage, oregano, or a blend of herbs and use a flavorful olive oil (1/3 cup) instead.
It’s completely up to you how you craft the flavor profile of this recipe. Really, the above is only a starting point and reference, make it your own!
As with most of my baked goods, I take a strong waft of my flour mixture to check if I can smell the flavors I eventually want to taste. If it’s not prominent enough, I add more of the spice or herb until it smells right. That’s how I got to the ratios I did for this recipe, and I recommend you do the same if you’re experimenting with the flavors.
I’ve also tried this recipe with white whole wheat flour (1:1 substitute for all purpose) and it’s turned out great. I appreciate the flavor the wheat flour brings with the herbed crackers and prefer the cleaner taste of AP flour for the cheese crackers, but it’s completely customizable based on your preference.
Pairing recommendations: These crackers are so flavorful, they’re delicious on their own! But, they also go perfectly with a glass of beer or wine. I also like them topped with some cheese and a thick slice of tomato.